The symptoms of a front wheel bearing gone bad are easy to diagnose. When the wheel bearing is going bad, you can hear a howl coming from the offending wheel bearing. As the bearing gets worse, the howling gets louder. Some other symptoms are that the howling becomes attenuated when the weight is shifted off it. For example, if your driver's side wheel bearing is failing, when you make a sweeping left-hand turn, the howling will be reduced. This is because the weight is shifting to the passenger's side of the car and off the dying wheel bearing. The howling noises will also be speed dependent.
Luckily for us, the wheel bearings in most E30s last a long time. My front wheel bearings went almost 175,000 miles before I started to hear a slight howl. Many people allow them to get worse before changing them, but I'm very progressive with my repairs.
Another thing that we should be thankful for is that the front wheel bearings are very easy to replace. The best write up I found on the web is from Randy Walters. I can add nothing to his write up but pictures and my own experience.
Let's begin the procedure! Remember that my 1991 318i may be slightly different than your car. Double check that the part numbers are the same for your exact car.
Click on the thumbnails for larger pictures.
 |
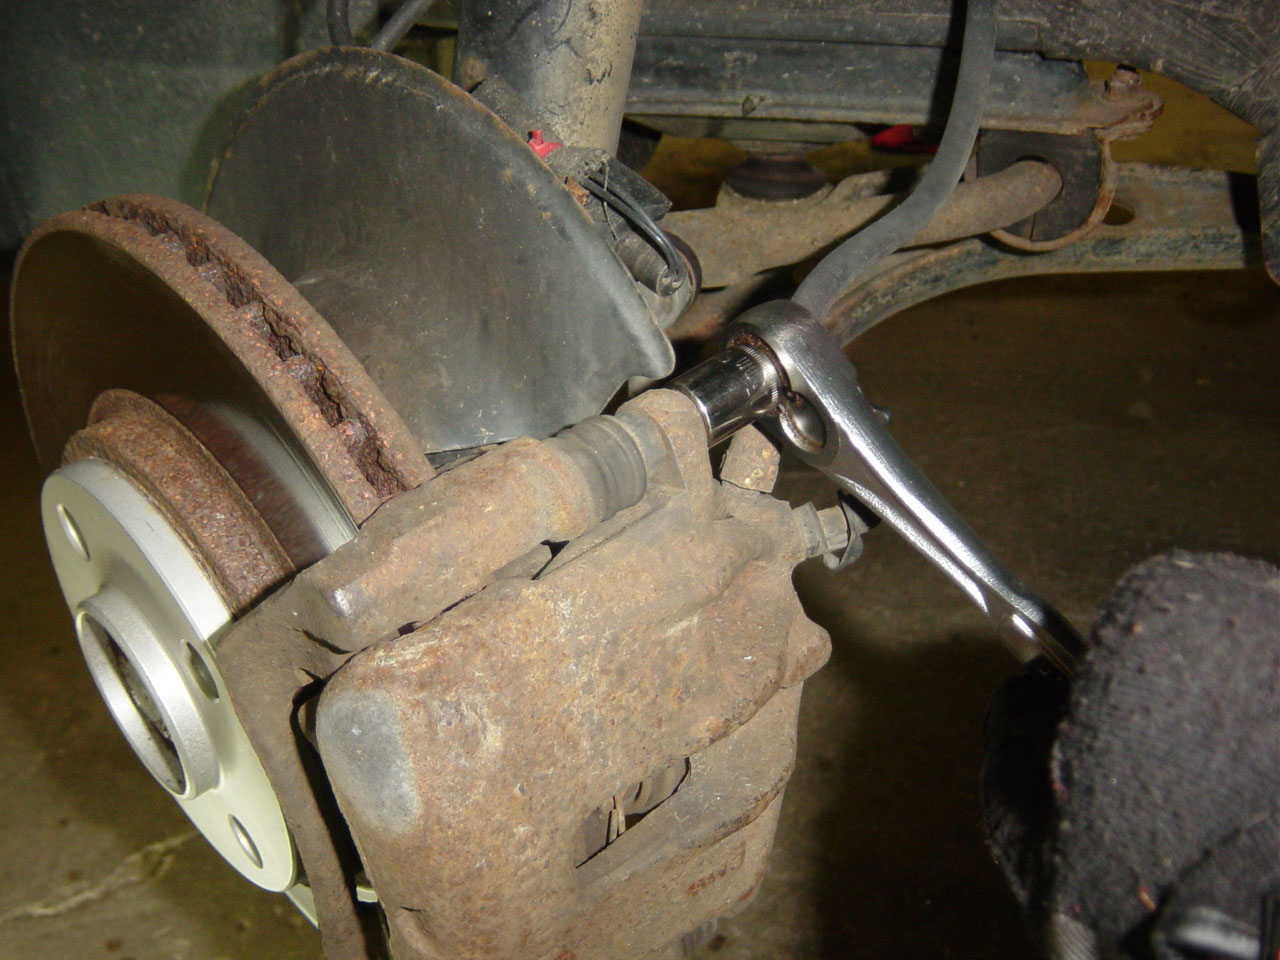
Slightly loosen the lug bolts and jack up the car. Remove the tire. Remove the caliper with a 17mm socket. |
 |
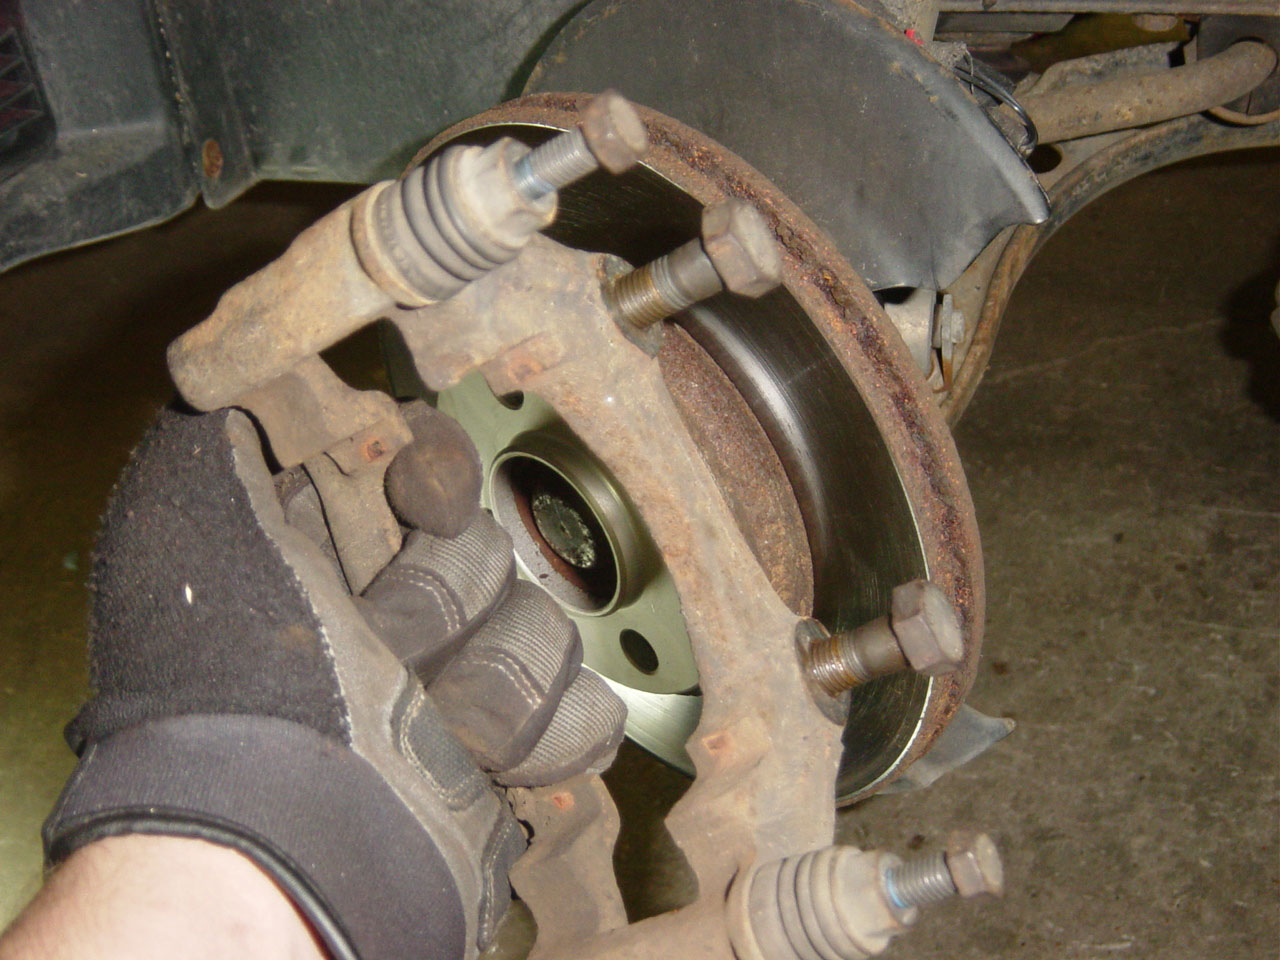
Remove the caliper holder by with a 19mm socket. |
 |
Zip tie the caliper to that loop in the wheel well and be sure that there is no pressure on the brake lines. The caliper should not hang from the brake line. Reinstall the screws in the caliper holder so you don't lose them! |
 |
Using a 6mm hex socket or wrench, remove the 6mm hex bolt that is holding the ABS sensor. Remove the ABS sensor. |
 |
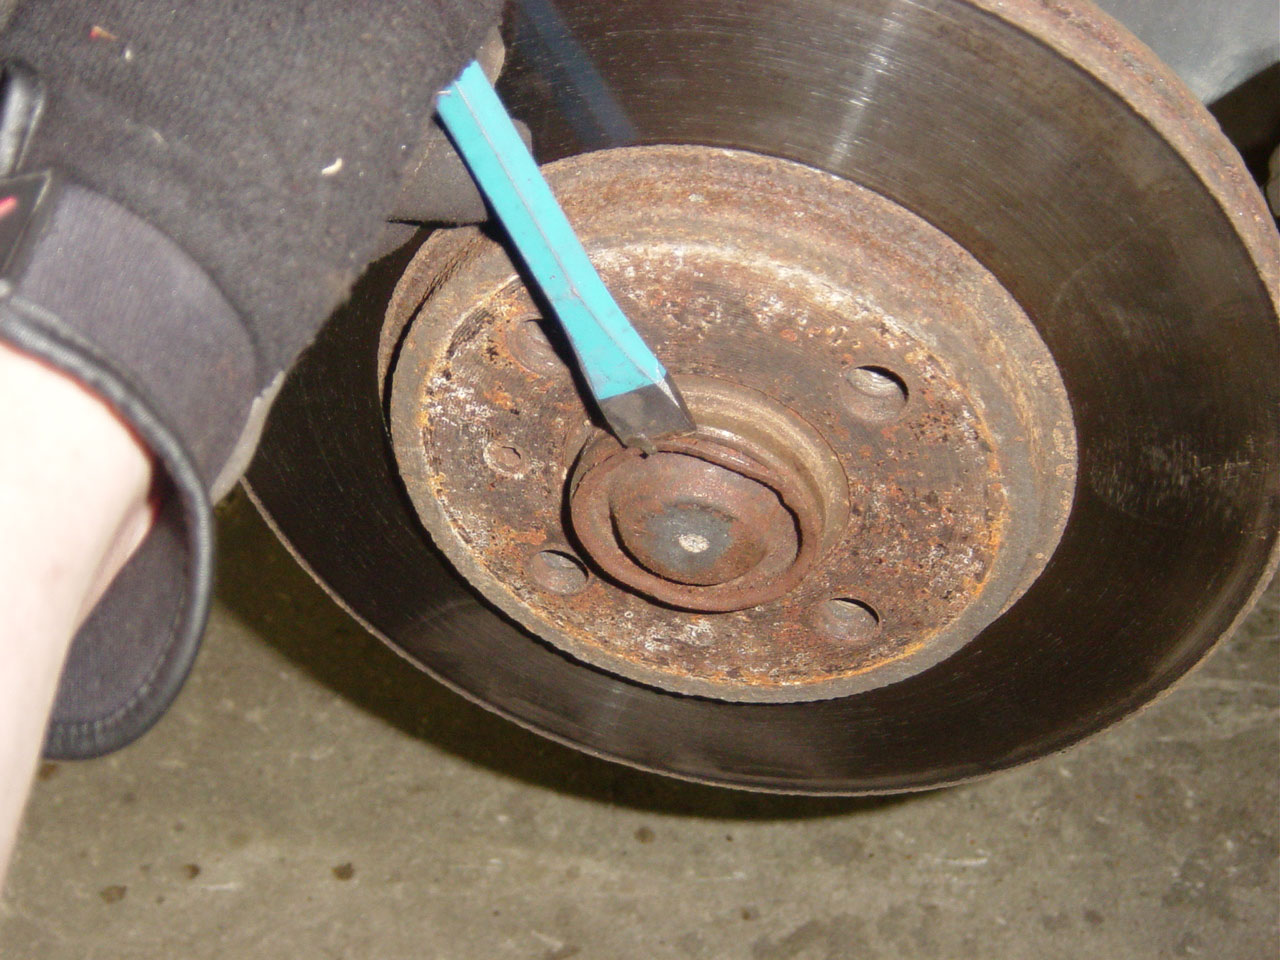
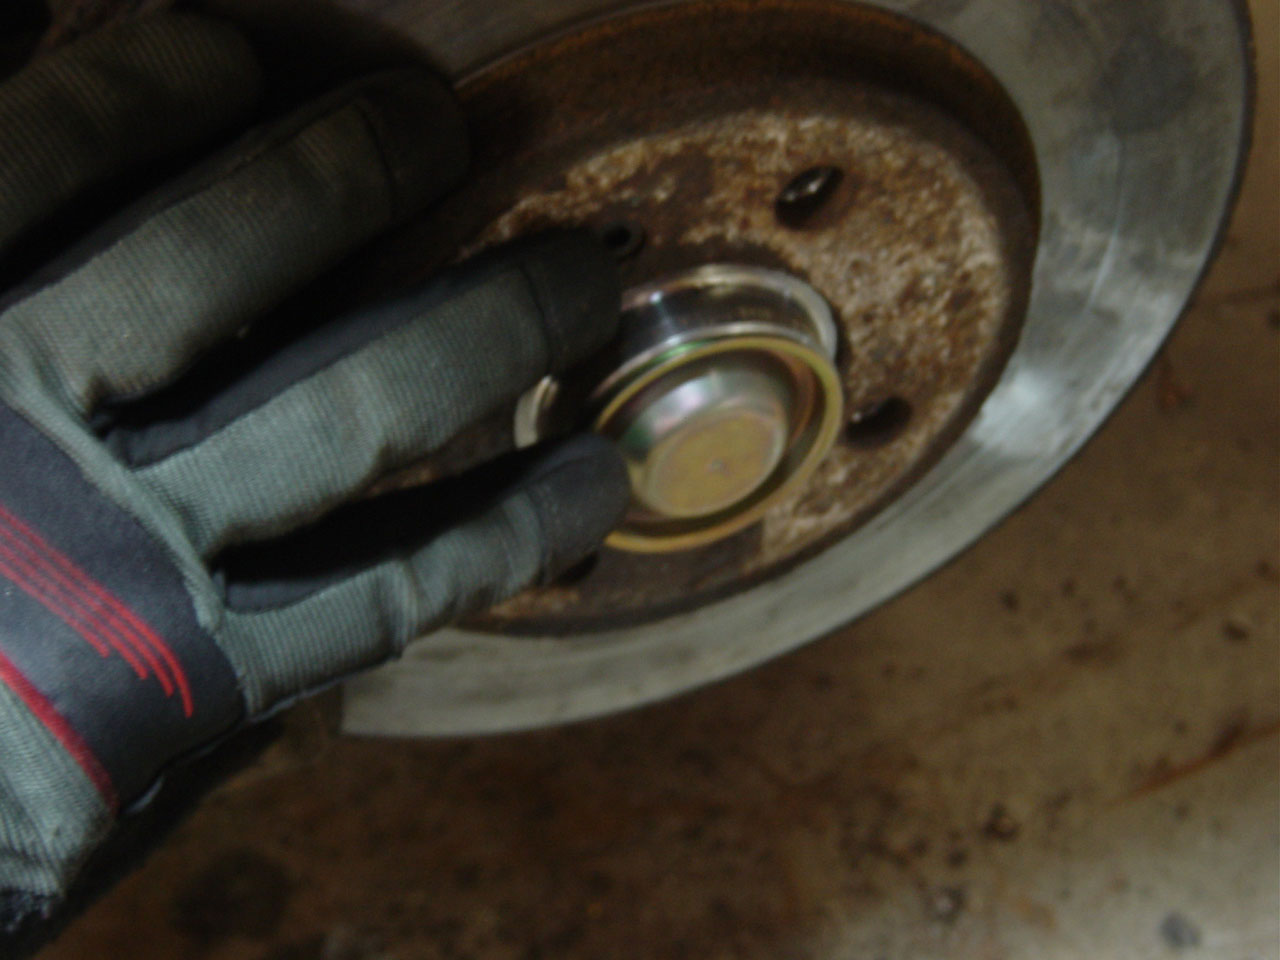
Using a chisel, remove the dust cap. |
 |
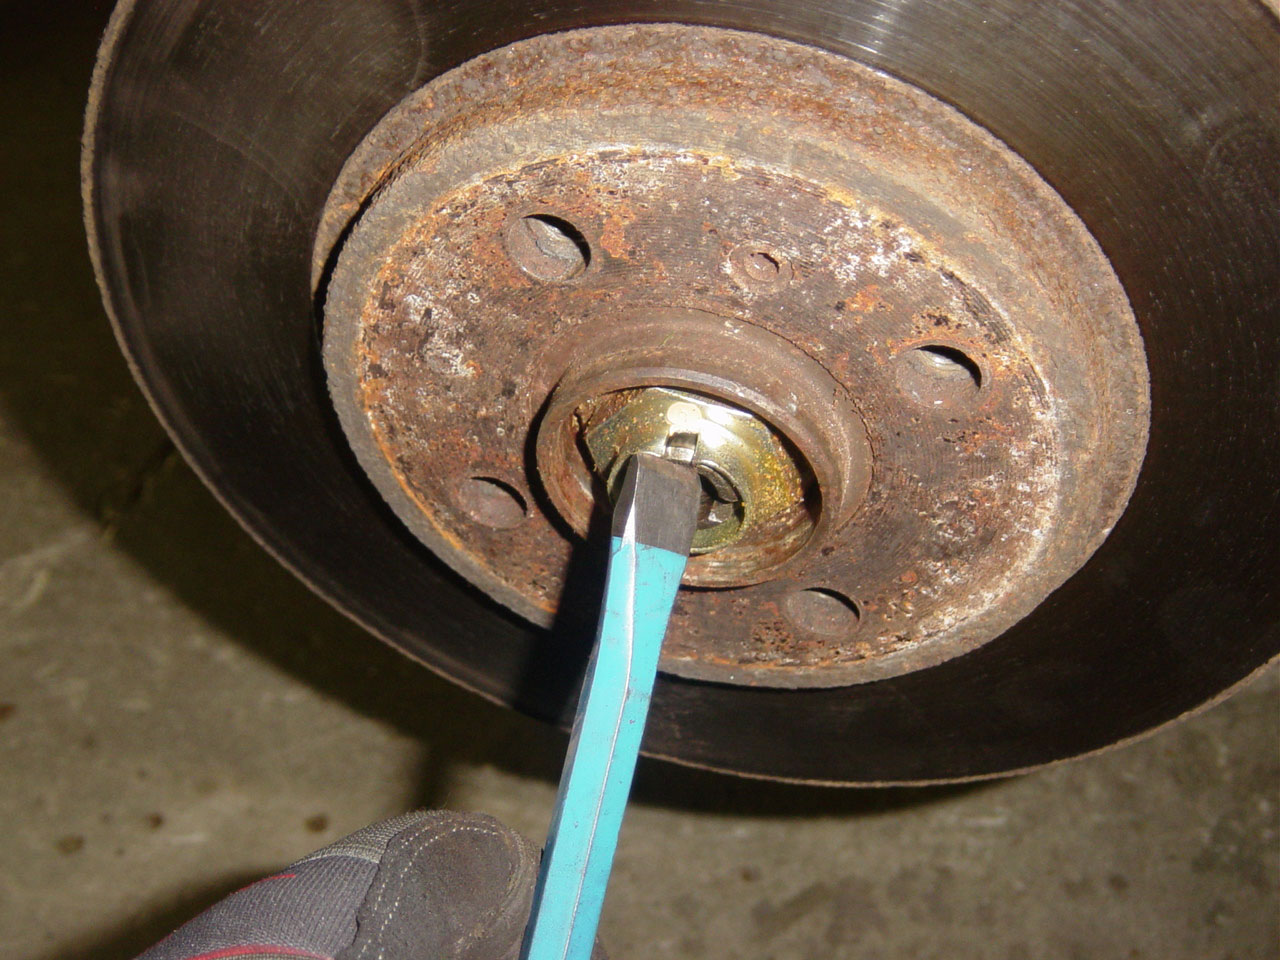
Bend the tab back outwards using the chisel. Spray the inner race ad the stub axle with a penetrating lubricant such as Liquid Wrench. Let set and repeat. |
 |
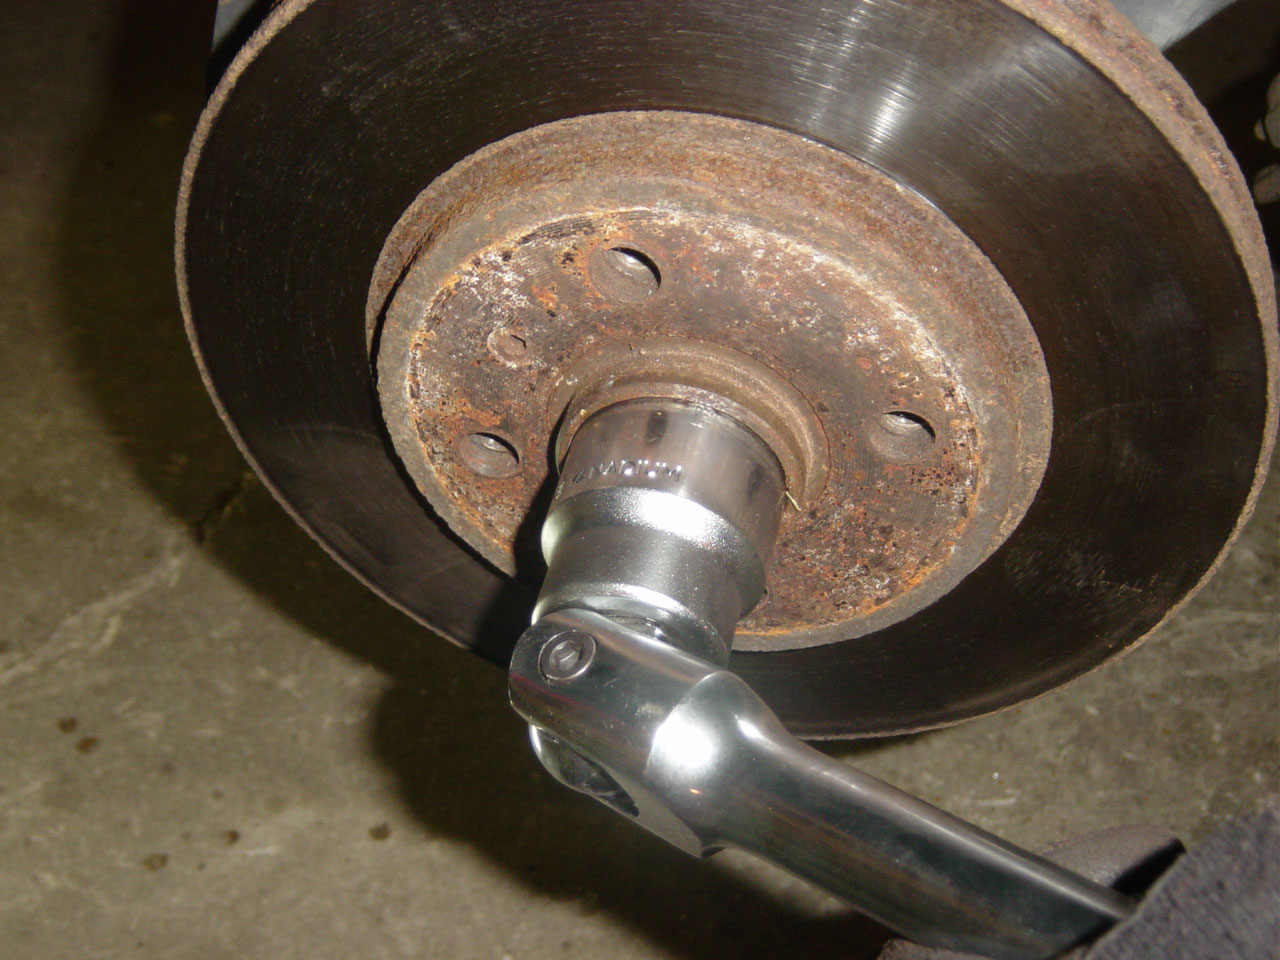
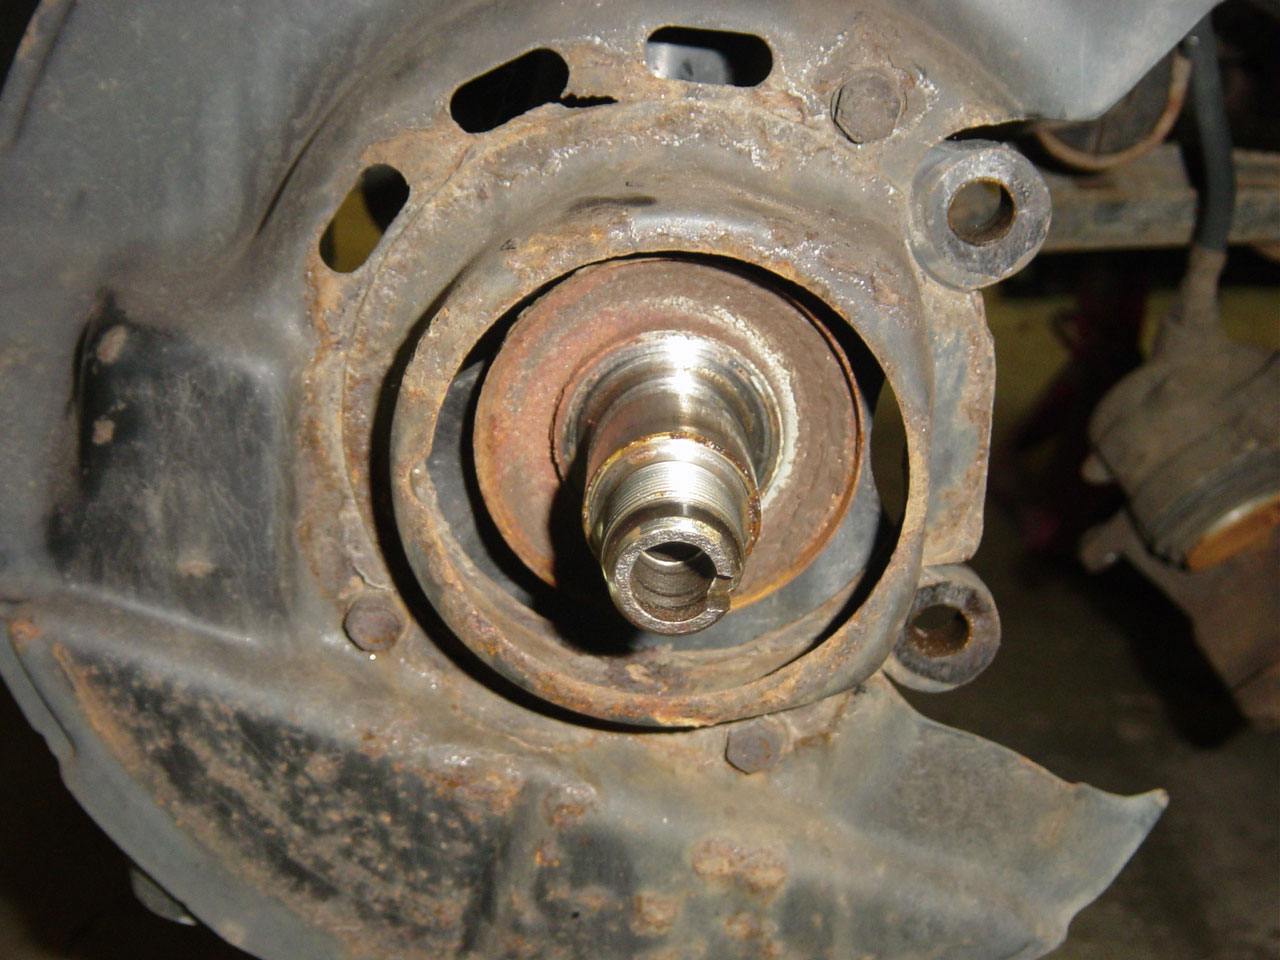
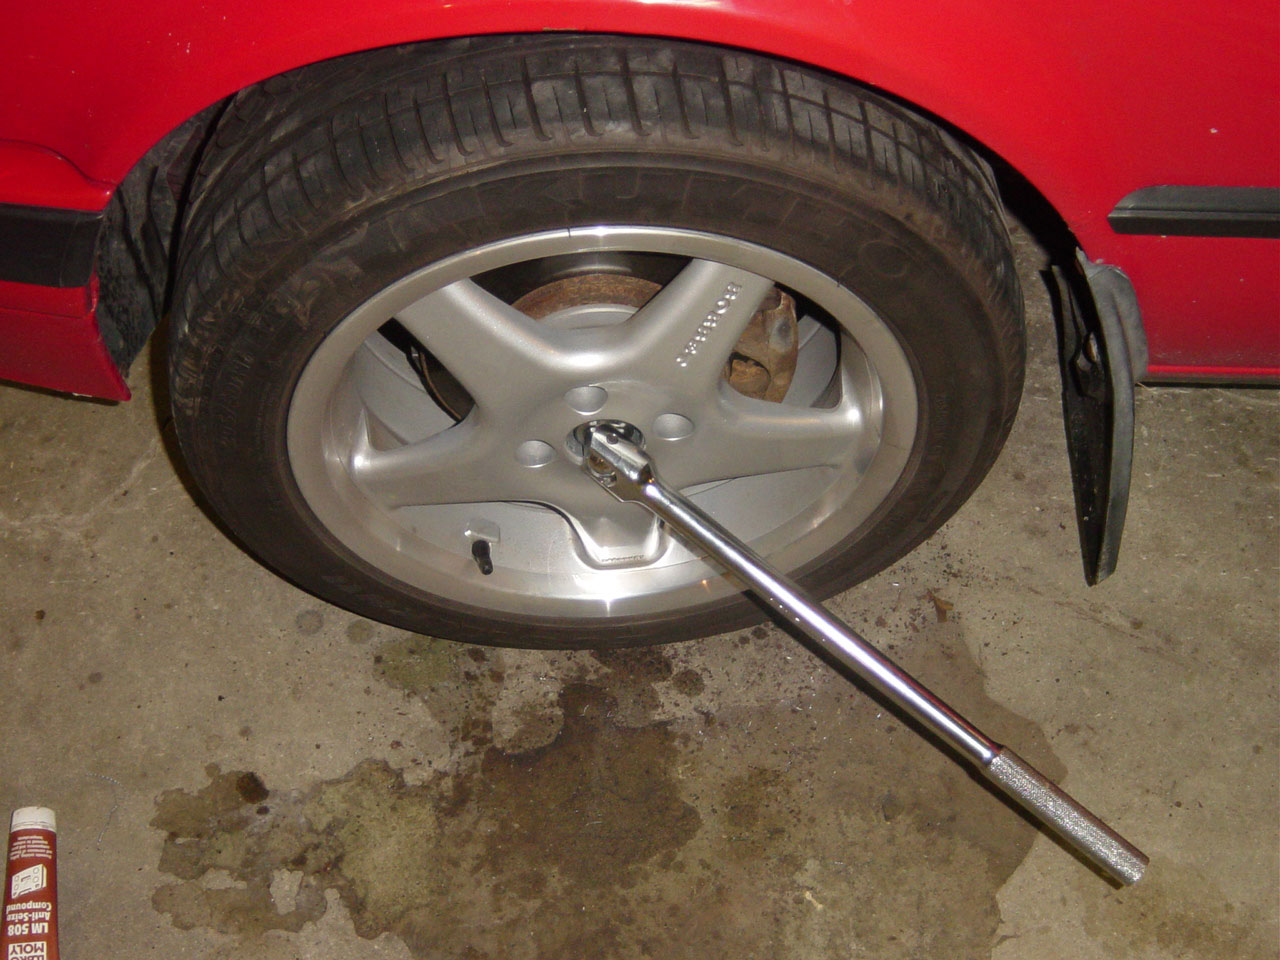
Reinstall the wheel. No need to torque the lug bolts Lower the car to the ground and with the parking brake set and the wheels chalked, loosen the collar nut though the center hole in the wheel.
The collar nut requires a 36mm socket. Before you start this procedure, make sure that your 36mm socket fits inside the hub. Some people have tried this procedure only to find out that the outer diameter of their 36mm socket is too large. If it will fit through the hole in your rim, it will work.
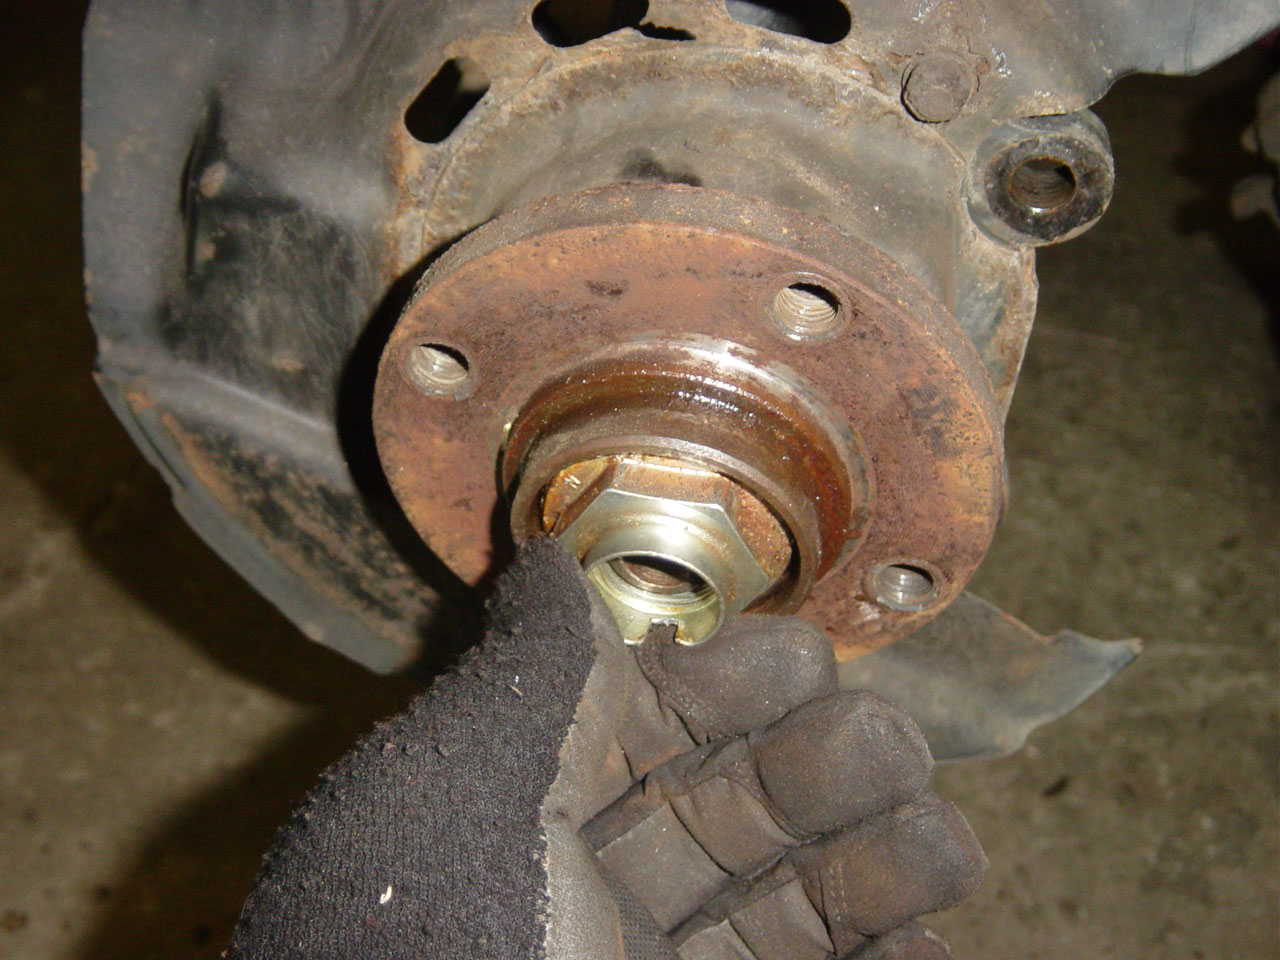
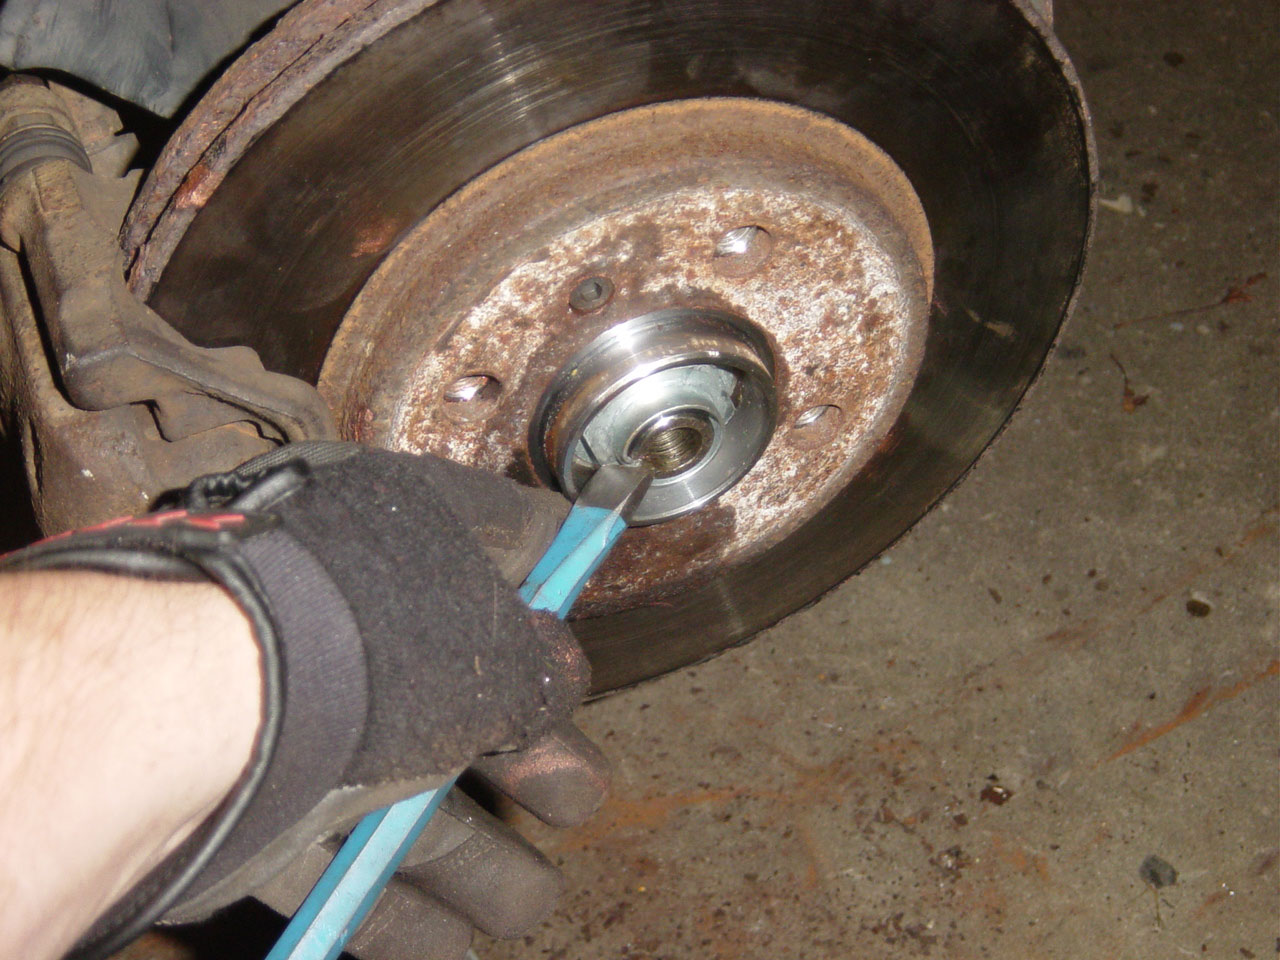
The collar nut is tightened to around 200 ft-lbs so you may need a cheater pipe. I'm a stud and the bar was plenty. :) Do not remove the nut, loosen it until there are
Jack the car up and support it properly on a jack stand. Loosen the nut so it is approximately 1/4" away from the bearing's inner race. |
 |
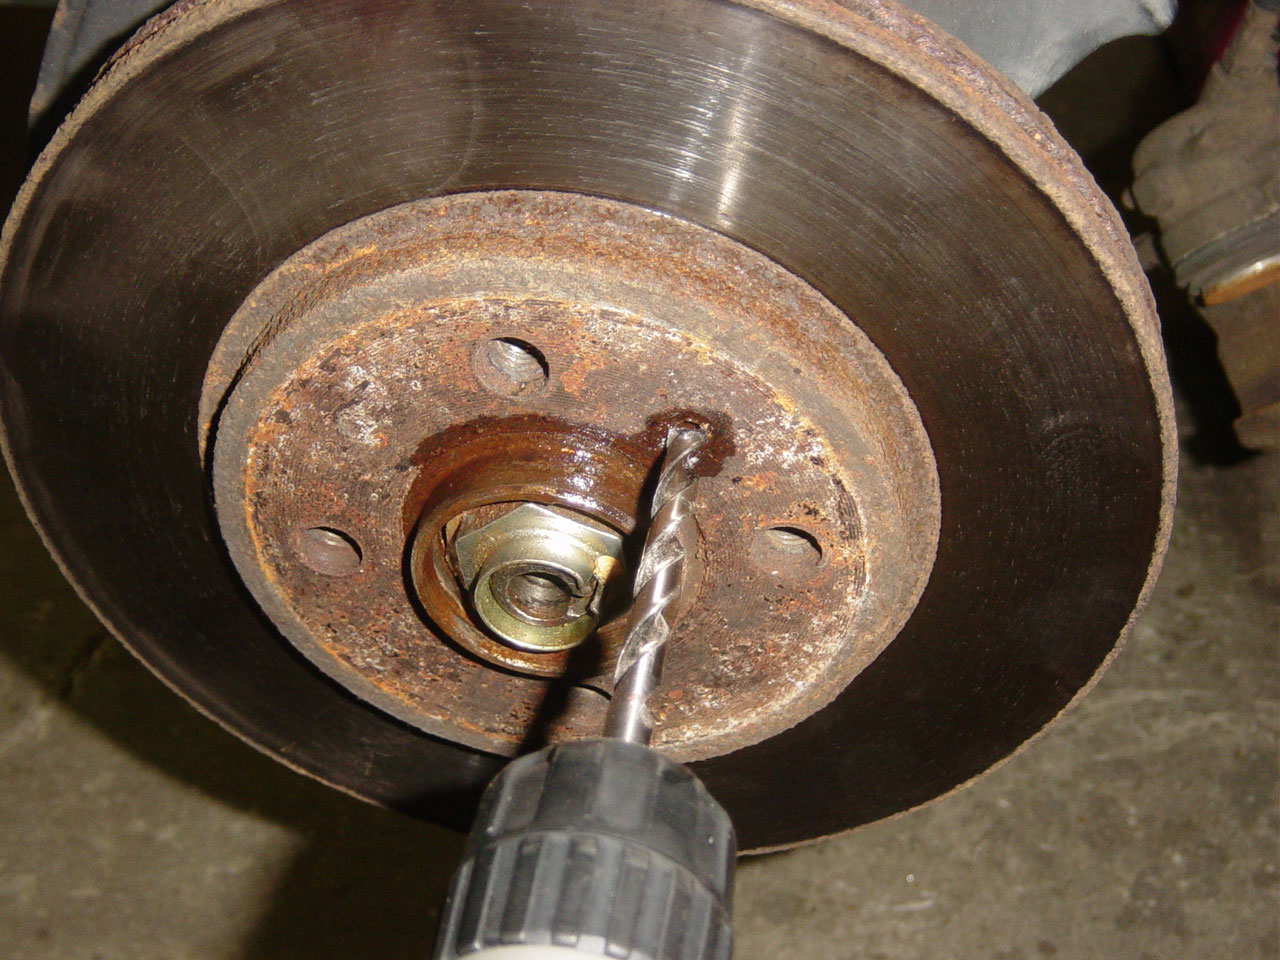
Remove the rotor by unscrewing the 6mm countersunk hex bolts. The bolts that hold my rotors on were frozen and stripped. Nice job previous owner! I had to drill mine out. I knew this was the case and had replacement bolts. After drilling them out, a few smacks and the rotor came right off. |
 |
The goal is to remove the old hub/bearings without leaving the bearing's inner races frozen on the stub axle. A smart trick that Randy suggests is to keep the tire on the hub and the collar nut on the inner race and yank on the tire a few times. If you don't keep the collar nut on the stub axle, make sure to gather all your broken teeth before you head to the hospital because you are going to smack yourself in the face with the tire if the hub comes off. The yanking action will be like a side hammer. Hopefully between this and the penetrating lubricant, the race will come right off.
Because I smacked my rotors a few times, I freed the bearings from the inner races and I didn't do the slide hammer technique. |
 |
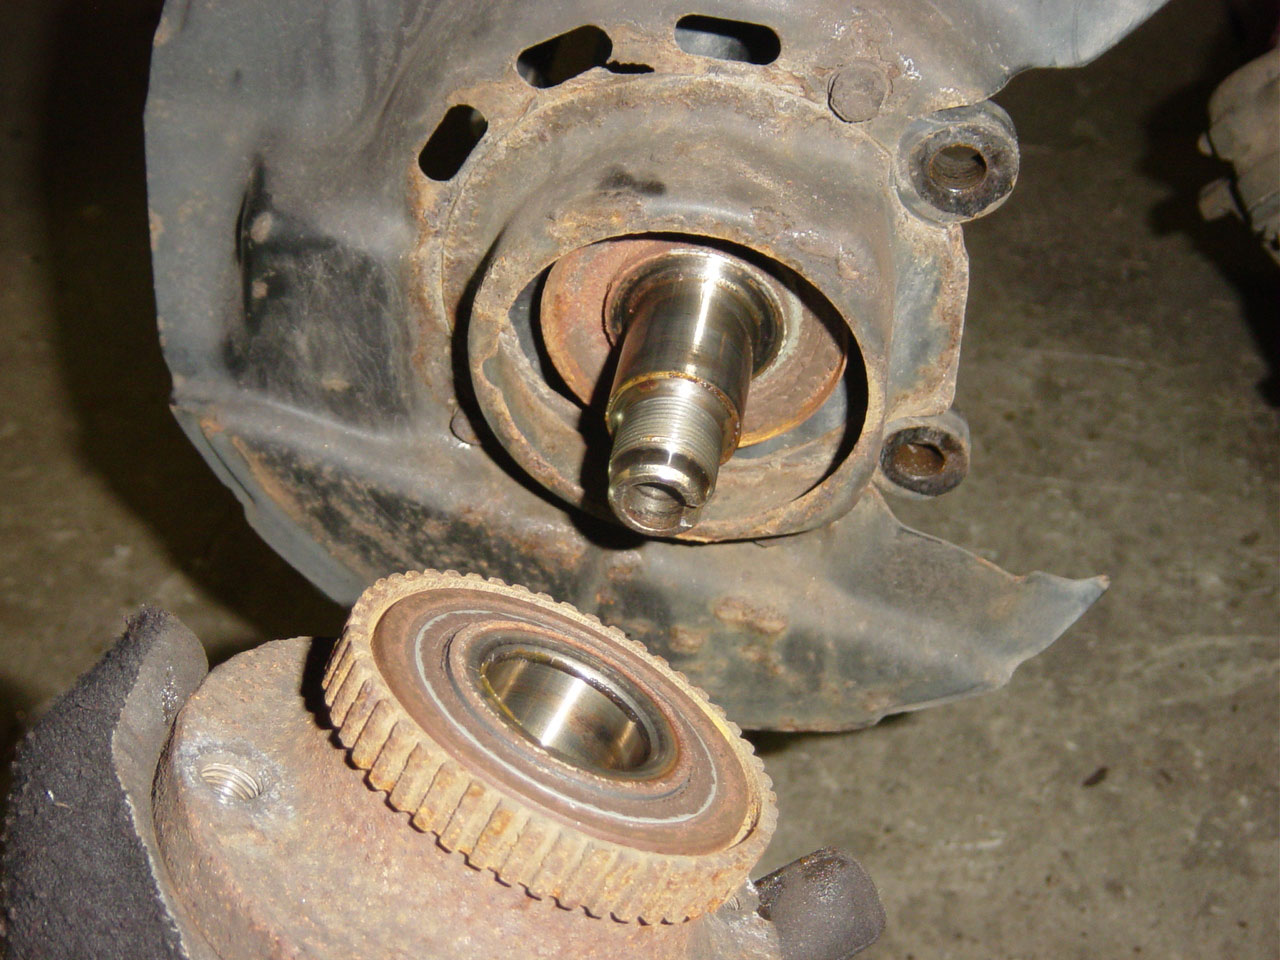
My hubs came out with the bearings. Beautiful!
If your inner race stays on your stub axle, this job gets more difficult. Your best bets are to use a heat, a chisel, a cutting wheel. Maybe a puller would do the job too if you could make it fit. |
 |
Take this opportunity to really clean the stub axle, the rear dust cap, and everything else in there. I had ordered a new rear dust cap, but I didn't want to force anything getting the old one off and it was in good condition so I left it. |
 |
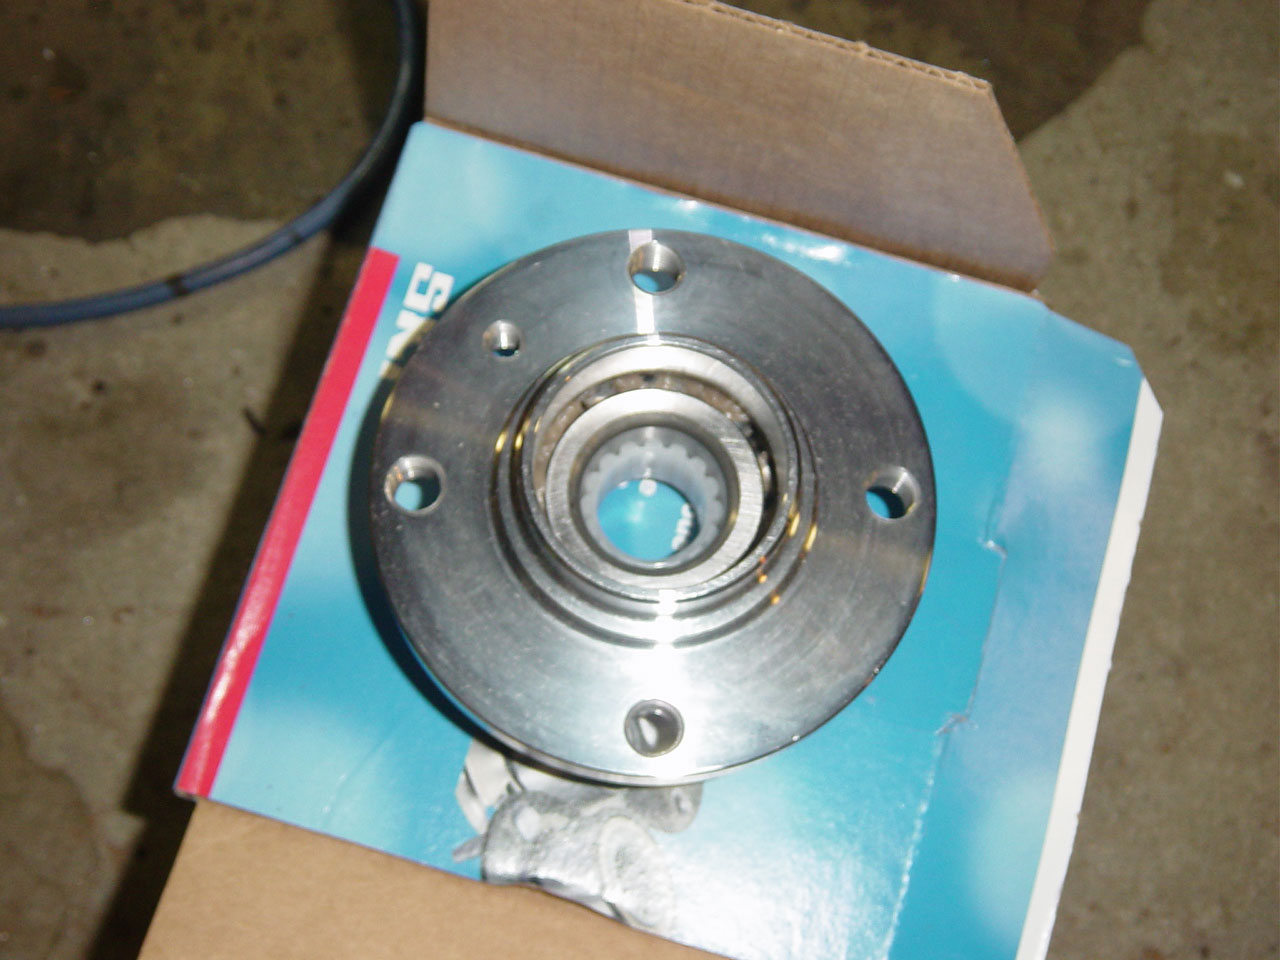
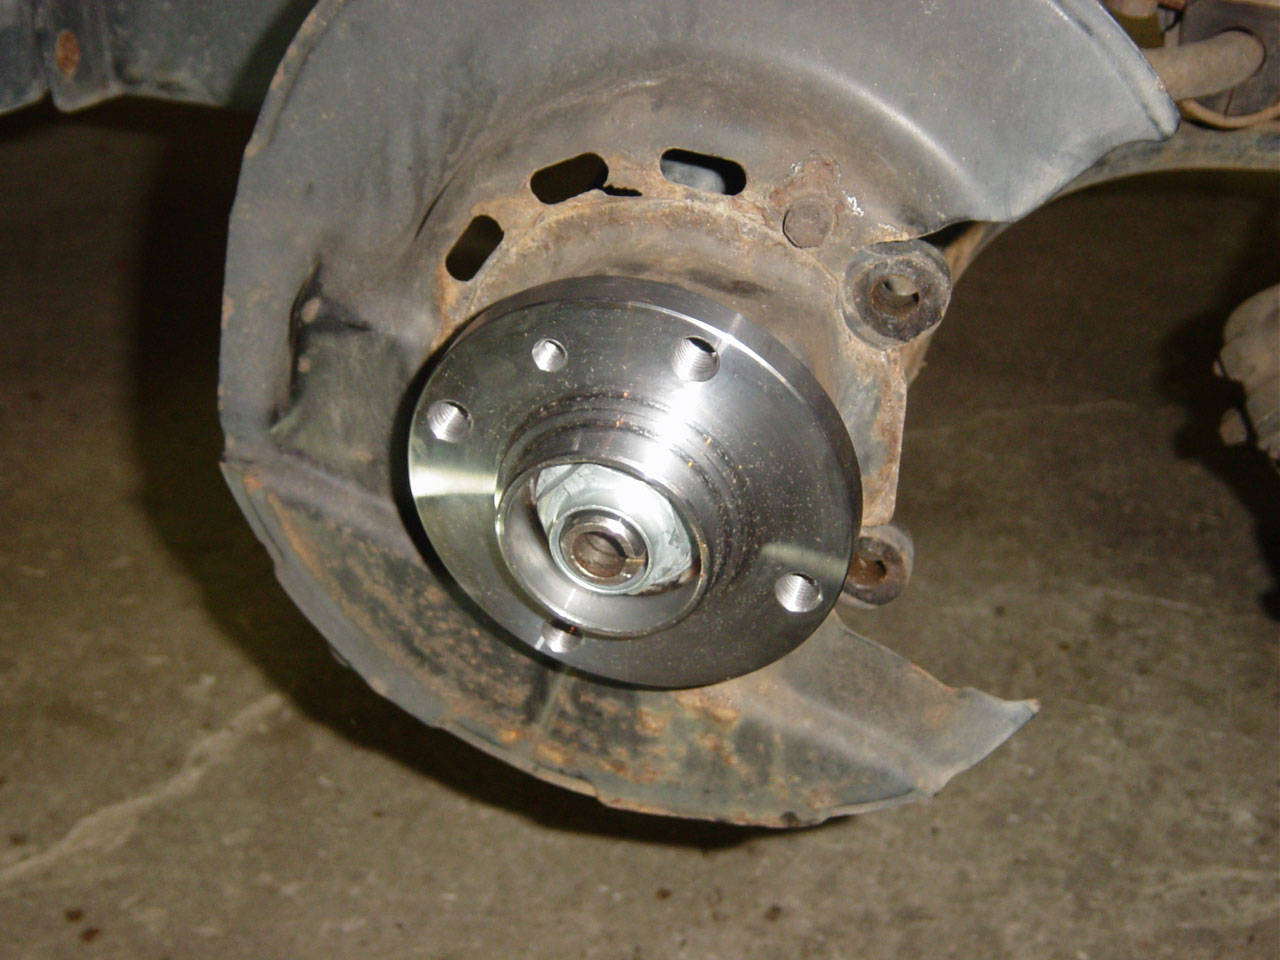
Here is the new hub. So shiny! The inside has a nylon ring that holds the two sections of inner race together inside the hub. Do not remove the nylon ring. |
 |
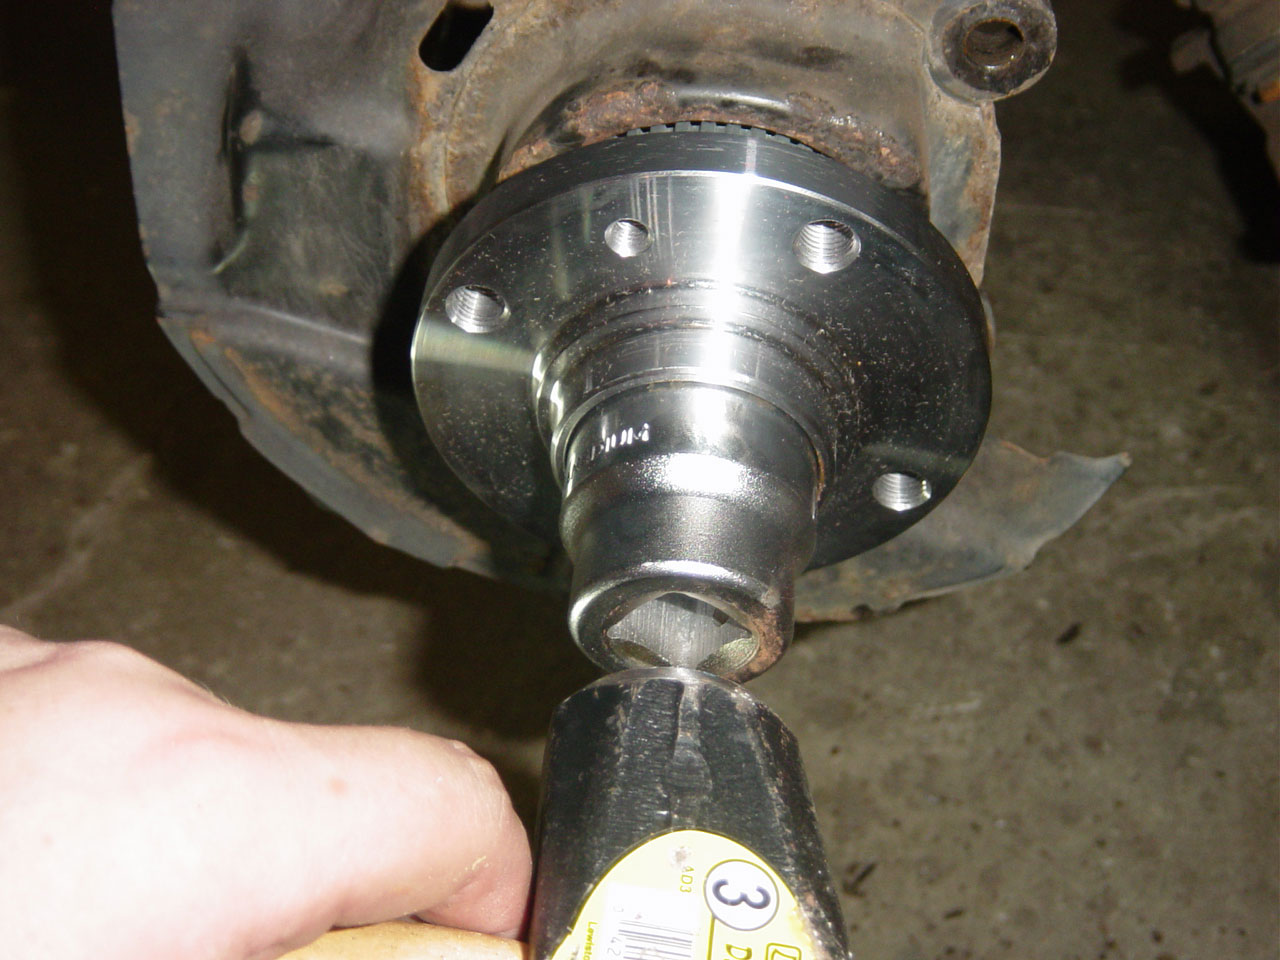
Place the new hub on the clean stub axle. Use your 36mm socket and gently tap the inner races of the new hub onto the stub axle. If you push on anything besides the inner race, all the races and probably the bearings will separate from the hub. You don't want this to happen. As you slowly put the hub on the stub axle, you'll notice the stub axle forcing the nylon ring out. |
 |
Keep going! Gently. I accidentally tapped too hard and didn't hit it straight on and one of the inner races popped out. Getting the inner race back into the hub is supposedly a real pain. The problem is that it requires even force to pop the race back onto the bearings. To get it back on, I put it flat on a table and used my 36mm socket to apply consistant pressure around the race and popped it straight on. It took me 1 minute. |
 |
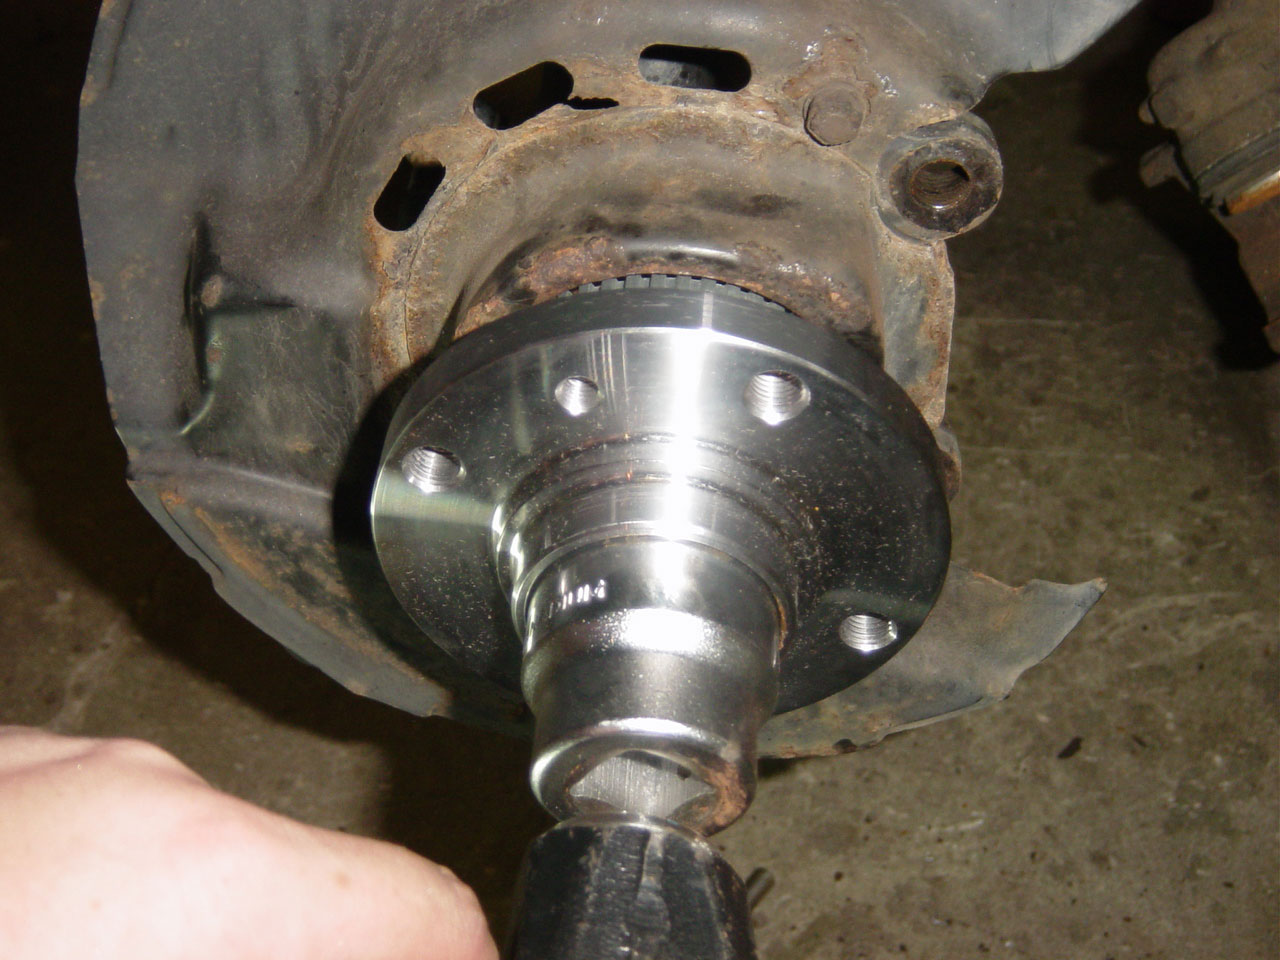
When you have it all the races on the axle part way, screw on the new collar nut. Tighten the collar nut with your 36mm socket and that will push the hub on the rest of the way. |
 |
Reinstall the wheel and lower the car. Torque the collar nut to 200 ft-lbs. |
 |
Jack the car up again. (I know - up, down, up down..). Use a chisel and bend the locking tab on the collar nut down. Reinstall the rotor, caliper holder, calipers, and ABS sensor. |
 |
Tap on a new dust collar. |
 |
Sit back and congratulate yourself for a job well done! |
| |
| Performed: |
July 16, 2005 |
| Mileage |
174,300 |