318i Tech Procedure
-
V1 Hardwire
I typically drive the speed of traffic or the speed limit if no
one is around me. I got a V1 Radar Detector because I drive one hour
each way to work. The V1 has paid for itself and has been the most
sensitive and sophisticated radar detector I've ever used. The sensitivity
is amazing. Radar sources are picked up at much greater distance than
what my old detector. The arrows listing the direction of the radar
are the best feature of this detector. After using the arrows and
seeing from what direction the radar is emitting, using any other
detector that just has a beep leaves you feeling blind.
Having a wire running from the cigarette lighter to the top of the
car is messy, so I decided to hardwire my V1 into my car. The goals
for this hardwiring are to keep the V1 as high in the car as possible
and close to the center of the car. I also wanted it to be easily
removable so it doesn't get stolen.
Required tool list:
Soldering Iron/Solder
Electrical Tape
Wire Cutters
Phone cord with RJ-11 connector
Inline fuse holder
Click on the thumbnail for larger pictures.
| |
The first thing you need to do is to determine
if you have a 12V source going to panel above the rear view
mirror on your windshield. If you have a check control system
or a power sunroof, you will have a 12V source. My car came
with just a basic check panel that blinks SRS Airbag and Seatbelt
and I have a crank sunroof. I had to get a 12V source. Look
at my Maplight Mirror Installation
page to see picture of how I routed 12V to this area.
For those of you who have 12V up there, I think these are the
proper pins from the check control system to grab the 12V and
ground needed for the V1.
Pin 9 = Ground
Pin 15 = Constant 12V
Pin 23 = Switched 12V
Use switched 12V so the detector is on only when the key is
in the car. You won't need your radar detector if the key isn't
in the car and you don't want to accidentally leave it on and
drain power from the battery.
|
 |
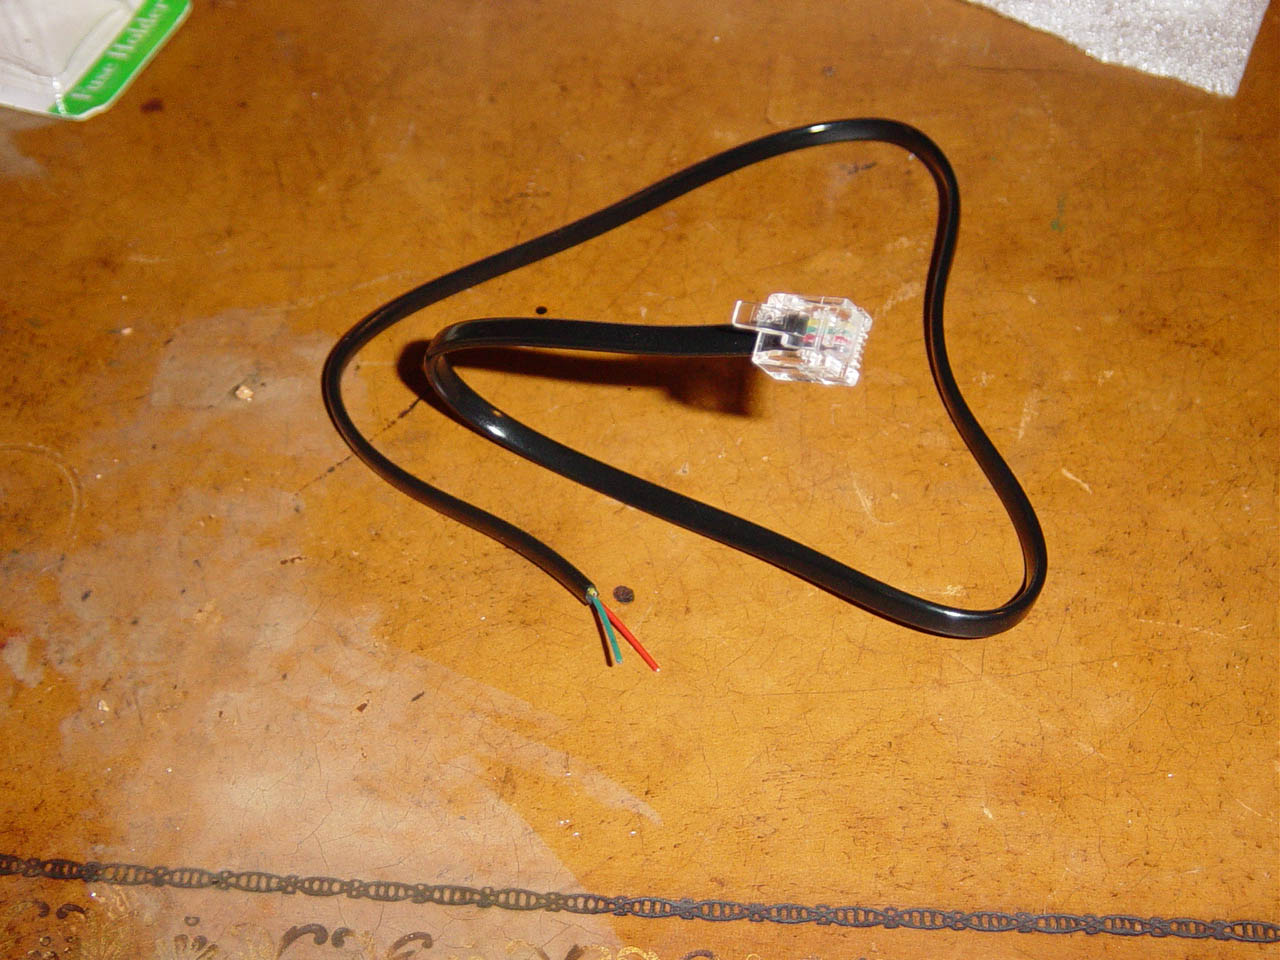
Now that you have a 12V source and ground, get a normal telephone
cord. I went to radio shack and bought one that was black to
match my car interior. The RJ-11 telephone connector is the
same as what the V1 uses.
Cut the telephone cord to about 12-18 inches.
Hold up the power cord that came with the V1, putting the side
with the locking clip upright. Look at the color of wires inside
the connector. Now find the half of the telephone cord you just
cut that has the same color sequence. The color sequence from
left to right is black, red, green, and yellow. The red wire
will be 12V and the green will be ground.
|
 |
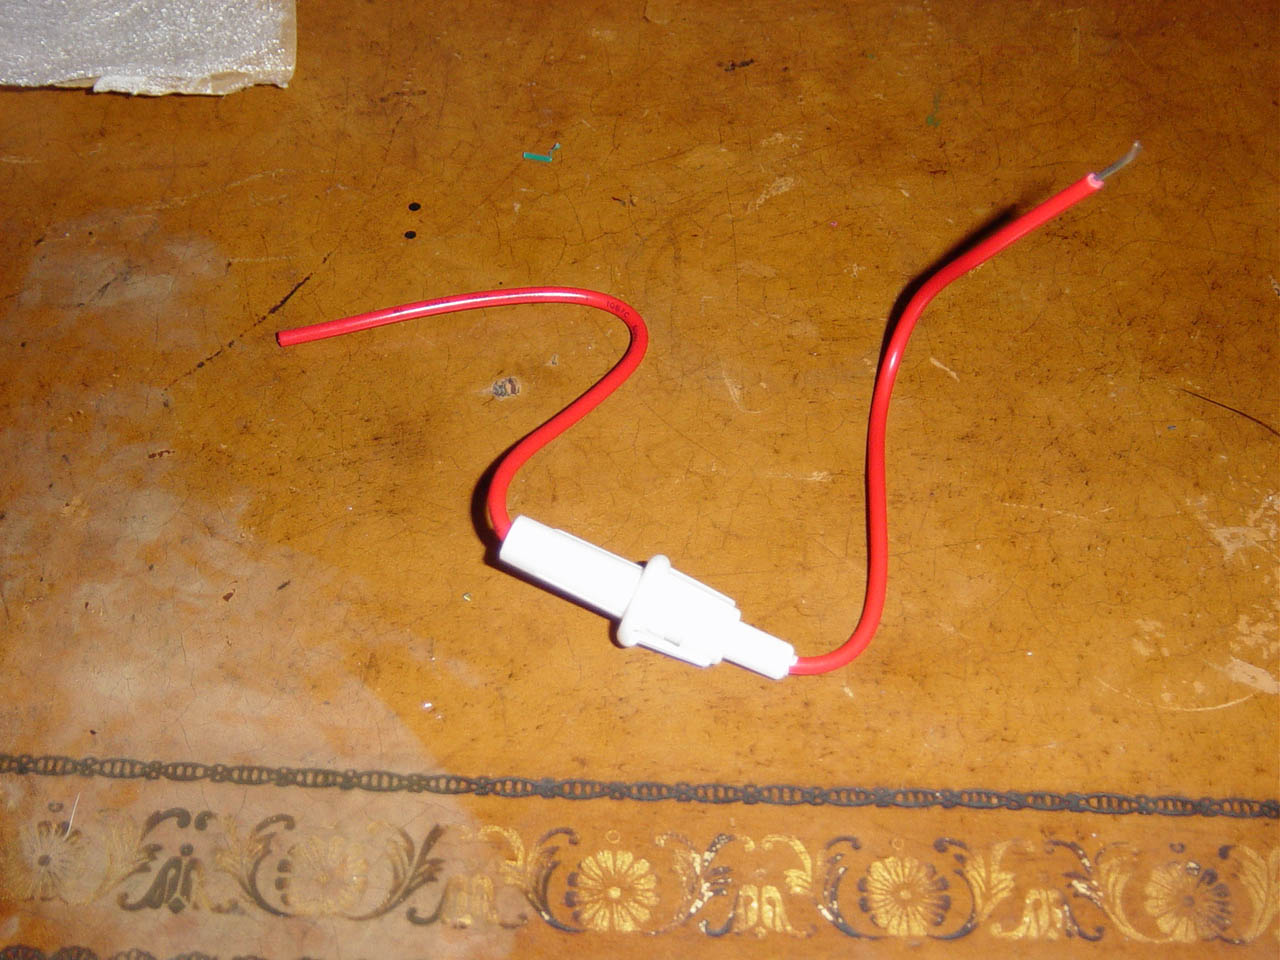
I got a small inline fuse and soldered it to the red wire. I
used a 5 amp fuse. |
 |
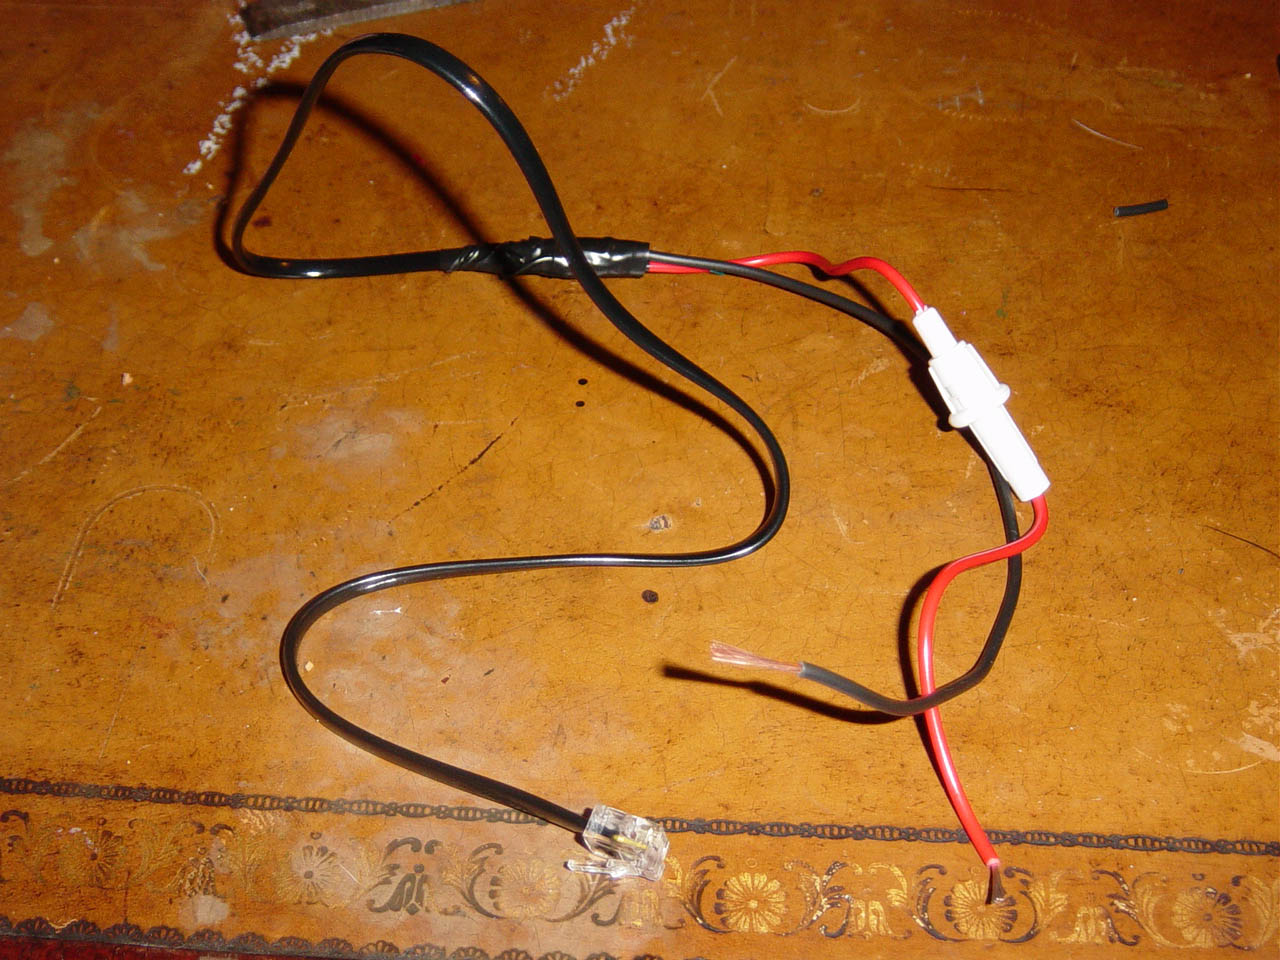
Here is a picture of the telephone cord attached to the fuse.
Solder the green telephone wire and the inline fuse holder to
the 12V source and ground. Use electrical tape to nearly tape everything up. Also wrap up the non-used colors like yellow and black. |
 |
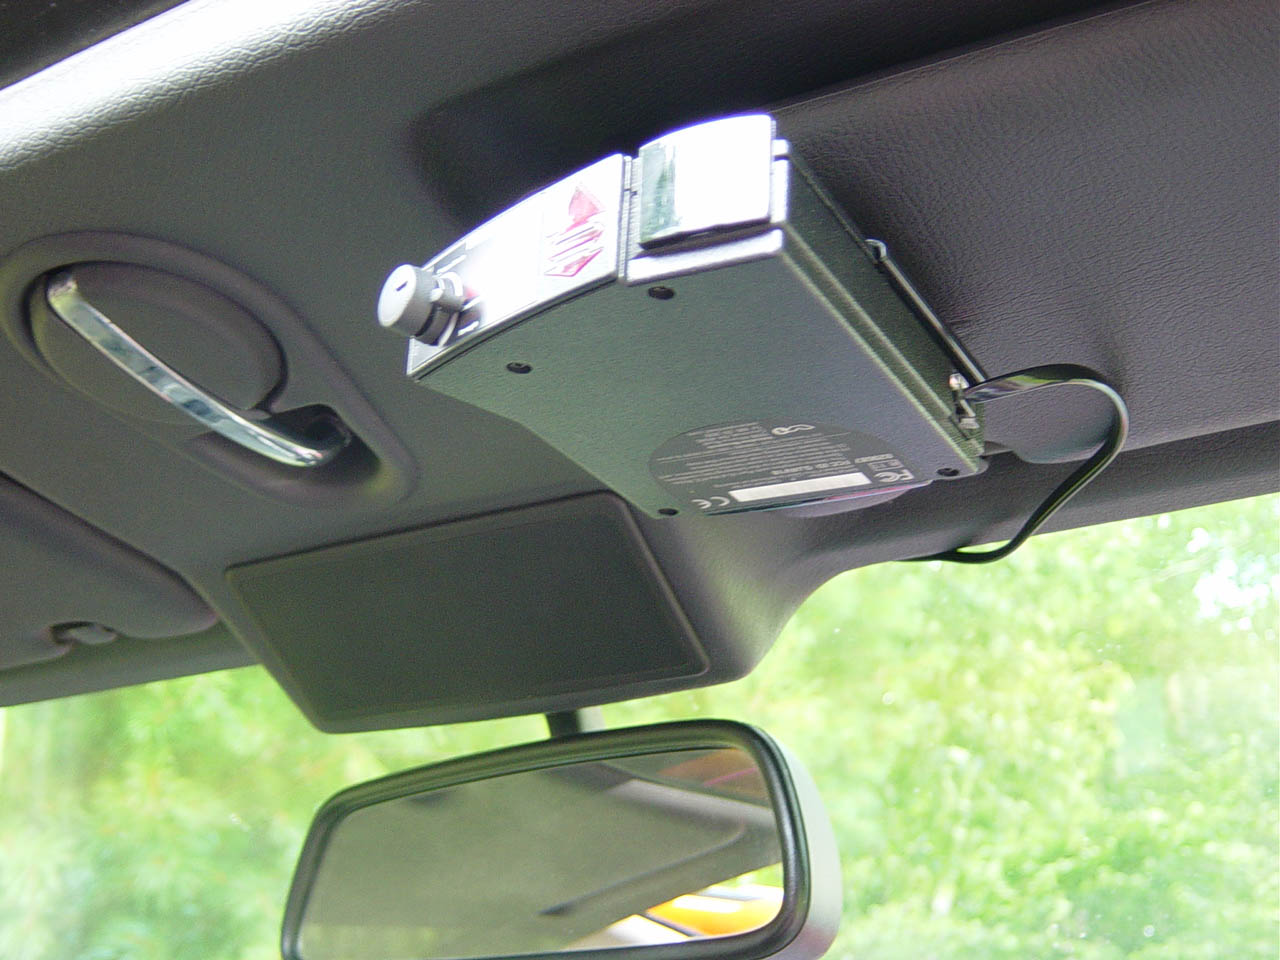
I ran the RJ-11 connect out from the roof lining right near
the sun visor and still use the visor clip so the V1 can come
down easily. When the V1 is taken down, the wire can be nearly tucked behind the visor. |
Difficulty:
1 /5
Disclaimer: I am not a professional mechanic. Information
this page should be used at your own risk and discretion. Different
models and model years may be different than my 1991 318i. Read: If
you screw your car up following my instructions, sorry. Isn't it sad
that in this sue crazy world you have to put a disclaimer on your
web page?